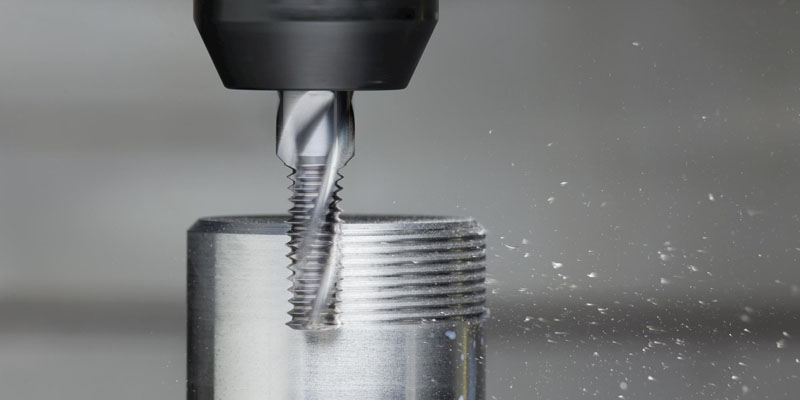
Dealing with a broken thread tap can be a frustrating issue in machining, but with the right tools and techniques, it can be efficiently resolved. A broken tap not only halts production but can also damage the workpiece if not properly addressed. In this post, we’ll cover professional methods for removing a broken thread tap, ensuring minimal damage and downtime.
1. Assess the Situation
Before proceeding, it’s important to evaluate the extent of the damage. If the tap has broken off flush with the workpiece, it will be more difficult to extract. If the tap is slightly recessed, you’ll have better access to it. Assessing the depth and orientation of the broken tap will determine your approach.
2. Use a Left-Handed Drill Bit
The simplest method for removing a broken tap is using a left-handed drill bit. Left-handed drill bits rotate counterclockwise, which can help “unscrew” the tap from the hole. Select a drill bit with a size slightly smaller than the tap’s diameter.
Step 1: Center-punch the broken tap to ensure precise drilling.
Step 2: Start drilling with low speed and moderate pressure. The left-handed rotation should engage the tap’s threads, causing them to loosen as the drill bit makes contact.
Step 3: If successful, the broken tap will begin to spin out as you drill deeper.
This method works best when the tap is not too embedded and when the breakage is not too deep.
3. Use Tap Extractors
Tap extractors are specialized tools designed to grip and remove broken taps. These extractors have multiple prongs that fit into the flutes of the tap, allowing you to turn it out of the hole.
Step 1: Insert the tap extractor into the broken tap’s flutes.
Step 2: Using a wrench or hand tool, rotate the extractor counterclockwise.
Step 3: Continue turning until the tap is fully extracted.
Tap extractors are efficient, especially when the tap is slightly recessed or when other methods fail.
4. Apply Heat
If the tap is stubborn, heat can help loosen the bond between the tap and the material. Heat expands the metal, potentially easing the removal process.
Step 1: Heat the area around the broken tap using a torch or heat gun.
Step 2: Once the workpiece is sufficiently heated, allow it to cool slightly.
Step 3: Try to remove the tap with a tap extractor or left-handed drill bit.
This method is particularly useful when dealing with high-tensile taps or workpieces that are heat-resistant, such as stainless steel.
5. Drill Out the Broken Tap
If the previous methods are unsuccessful, drilling out the broken tap may be necessary. This process involves using a drill bit to remove the tap material, allowing you to re-thread the hole.
Step 1: Choose a drill bit slightly larger than the tap’s core diameter.
Step 2: Drill carefully through the center of the tap. Start with a small pilot hole, gradually increasing the size.
Step 3: Once most of the tap material is drilled out, use a tap removal tool or a punch to extract the remaining fragments.
This method requires patience and precision, as it’s easy to damage the workpiece if the drill bit drifts off-center.

6. Use a Dremel Tool or Grinding Tool
In some cases, using a Dremel tool or grinding tool to grind down the broken tap can be effective, particularly when the tap is deeply embedded.
Step 1: Use a small grinding tool or Dremel with a carbide burr or diamond bit.
Step 2: Carefully grind the broken tap down, avoiding contact with the surrounding material.
Step 3: Once the tap has been ground flush, use a center punch or a pick to extract any remaining fragments.
Grinding requires a steady hand and precision, especially when dealing with hardened taps or delicate materials.
7. Use Chemical Methods (For Hardened Taps)
For taps that are extremely difficult to remove, such as those made of hardened steel, certain chemical solutions can help dissolve or weaken the tap’s structure. These methods are typically used as a last resort and should be used with caution.
Step 1: Apply a penetrating solution like muriatic acid or a specific tap removal chemical to the broken tap.
Step 2: Allow the chemical to sit for the recommended time, usually a few hours, depending on the severity of the tap’s material hardness.
Step 3: After the chemical has had time to act, attempt to extract the tap using the methods above.
Chemical methods can be effective but should only be used in controlled environments, as they can cause damage to sensitive materials if misapplied.
8. Prevent Future Breakages
To avoid future broken tap issues, ensure proper tapping procedures:
Use the correct tap size for the hole.
Ensure sufficient lubrication during tapping.
Choose the right tap material for the workpiece.
Use taps designed for the specific material you are machining.
Maintain optimal RPM and feed rates to prevent excess pressure on the tap.
Conclusion
Removing a broken thread tap requires a systematic approach, starting from the simplest methods like left-handed drill bits to more advanced techniques such as drilling out the tap or applying heat. The key is to assess the situation and select the right tool or method to minimize damage and downtime. By following best practices and using the proper tools, professionals can handle broken taps efficiently, ensuring minimal impact on production schedules and workpiece integrity.


