Quality is the key to a company’s success. Any machining industry attaches great importance to product quality. Therefore, the inspection tool for the product is particularly important, so today I will introduce you to the vernier caliper, the basic inspection tool in the machining industry.
In this article, we will introduce the definition, reading method, storage method and precautions of vernier calipers. Hope it will help you.
Vernier Caliper Definition
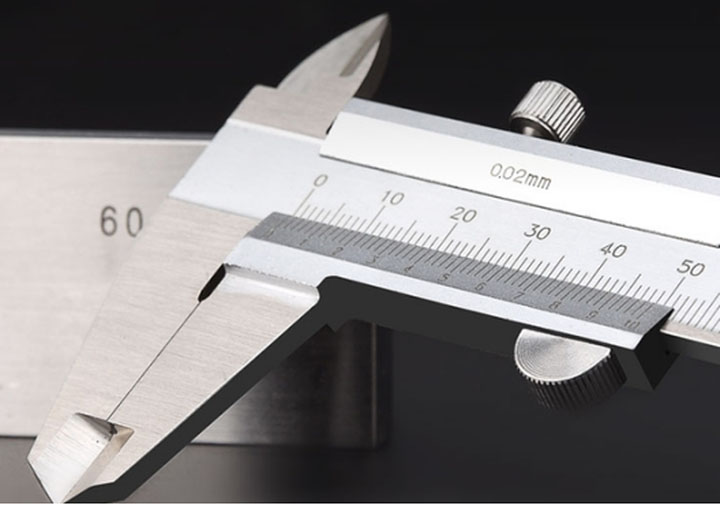
Vernier Caliper (VERNIER CALIPER) is an equipment used to check and confirm processed parts in rough machining and semi-finish machining of machining, and to measure the dimensions of machined parts with large tolerances. It is a measuring tool for measuring length, inner diameter and outer diameter, and depth. The vernier caliper includes a main ruler and a sliding vernier caliper connected to the main ruler. The main ruler is usually in millimeters. The vernier has 10, 20 or 50 graduations. According to different divisions, vernier calipers can be divided into 10-dimension vernier calipers, 20-division vernier calipers, 50-division vernier calipers, etc. The vernier is 9mm for 10 divisions, 19mm for 20 divisions, and 49mm for 50 divisions. There are two movable measuring jaws on the main ruler and the vernier of the vernier caliper, namely the inner measuring jaw and the outer measuring jaw. The inner measuring jaw is usually used to measure the inner diameter, and the outer measuring jaw is usually used to measure the length and outer diameter. The minimum readings are There are two types: 0.05mm and 0.02mm.
How To Read The Vernier Caliper
When using a vernier caliper to measure the size, the reading of the value is carried out using two scales, the main ruler and the secondary ruler (vernier ruler).
・The scale of the standard sub-scale (vernier scale) is the scale obtained by dividing the n-1 scale of the main scale into n equal parts.
・The standard sub-ruler (Vernier Ruler) has two types: 1/20 and 1/50.
How to read the scale, as shown below

- Read the scale value of the main scale indicated by the sub scale “zero”.
→At this time, because it is between 7mm and 8mm, the measured value should be (7+α)mm.
- Find the part where the main ruler and the sub ruler have the same scale.
→At this time, according to image, the 4th scale line of the sub-scale is consistent with the main scale.
- When the secondary scale of the vernier caliper is 1/20, because 1 scale=0.05mm, multiply the same number of scales on the secondary scale by 0.05 to calculate the α value.
→At this time, α=0.05×4=0.20mm
- According to the above, 7mm+0.20mm=7.20mm is the fixed value of the size measurement.
Precautions During Measurement
・Before measurement, check to make sure that the base point of the vernier caliper is the same? Clarify the accuracy of the zero value.
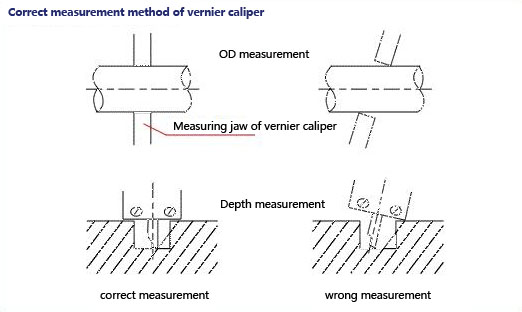
・The part holding the object to be measured (the inner and outer jaw parts of the vernier caliper) should be as close to the main ruler as possible.
・The measuring surface of the measuring part (inner and outer jaws, depth gauge) of the vernier caliper should be correctly in contact with the object to be measured.

・The measurement force cannot be too strong/too weak, and a constant force should be used for measurement as much as possible.
・The scale value should be read at right angles.
・After use, wipe off the dirt and store it in a place where humidity and temperature changes are small to prevent deformation.
Storage Method
After using the vernier caliper, wipe it clean with cotton yarn. When it is not used for a long time, wipe it with butter or engine oil. The two measuring jaws should be closed and the fastening screws should be tightened, and then put it into the caliper box and cover it.

Precautions:
- The vernier caliper is a more accurate measuring tool. It should be handled with care and should not be bumped or dropped to the ground. Do not use it to measure rough objects during use, so as not to damage the measuring claw and avoid placing it with the cutting tool. Together, so as not to scratch the surface of the vernier caliper, it should be placed in a dry and neutral place when not in use, away from acid and alkaline substances to prevent corrosion.
- Wipe the caliper clean before measuring, and check whether the two measuring surfaces and the measuring edge of the caliper are straight and intact. When the two measuring jaws fit tightly, there should be no gap, and the zero position of the vernier and main ruler should be aligned with each other. This process is called calibration of the zero position of the vernier caliper.
- When moving the ruler frame, the movement should be free and not too loose or too tight, let alone shaking. When fixing the ruler frame with the fixing screw, the reading of the caliper should not change. When moving the ruler frame, don’t forget to loosen the fixing screw, and it should not be too loose to prevent it from falling off.
- When measuring parts with vernier calipers, excessive pressure is not allowed. The pressure should be such that the two measuring jaws just touch the surface of the part. If the measuring pressure is too large, not only the measuring jaws will bend or wear, but the measuring jaws will be under pressure. Produce elastic deformation and make the measured size inaccurate (the outer size is smaller than the actual size, and the inner size is larger than the actual size).
- When reading on the vernier caliper, hold it horizontally in the direction of the bright light, so that the line of sight of the person is as perpendicular to the engraved surface of the caliper as possible, so as to avoid reading errors.
- In order to obtain the correct measurement results, you can measure several times, that is, measure in different directions on the same section of the part. For longer parts, you should measure at various parts of the full length to obtain a more correct measurement results.


